

Easy Stripe Subscription Management in Flask with Blueprints
Learn how to integrate Stripe in your code the modular way


Are you looking to integrate Stripe into your Flask application but don’t know where to start?.
In this tutorial I’ll be showing you how to integrate a payment system like Stripe into your Flask app while making the code organized, modular, and scalable.
Let’s dive into setting up Stripe subscriptions in your Flask app using Blueprints!
Getting Started with Flask and Stripe
Ensure you have Flask and Stripe’s Python library installed. Then, set up your environment variables to securely store your Stripe API keys.
Lets set up a virtual environment ensures that your project dependencies are isolated and managed effectively.
conda create -n flask_web
conda activate flask_web
conda install python=3.8
pip install -r requirements.txt
Here I’m using conda because it simplifies package management and environment setup but you can also use the build-in pip library.
requirements.txt example
Flask==2.0.2
gunicorn==20.1.0
python-dotenv==0.19.2
requests==2.26.0
urllib3==1.26.7
Werkzeug==2.0.2
stripe==6.6.0
Create a .env file with these variables to start
Env variables securely store sensitive data like API keys and configuration settings, keeping them separate from source code for enhanced security and flexibility. This way we don’t accidentally expose it in code.
STRIPE_SECRET_KEY=sk_test_some_random_key
STRIPE_WEBHOOK_SECRET=whsec_some_secret_key
DOMAIN_URL=https://yourwebsite.com
secret key can be found on your Stripe Dashboard
webhook key can be found on your Stripe Webhook Dashboard
We are going to use these env variables in the later part of the tutorial
In your code you can load the env file into environment like this
from dotenv import load_dotenv

load_dotenv()
Setup Payment Blueprints
Instead of adding all routes directly to your main Flask app, you can use Blueprints to organize your payment-related routes.
Using Flask Blueprints streamlines your application by modularizing code, making it easier to manage, scale, and maintain complex functionalities separately. The last thing you want is to modify a line of code in a 2000 line file.
First, create a new Python file for your payment logic called payment.py.
from flask import Blueprint, jsonify, request
import stripe
import os
from dotenv import load_dotenv

load_dotenv()
payment = Blueprint('payment', __name__)
# This allows us to easily manage Stripe related env vairables
stripe_keys = {
    "secret_key": os.environ["STRIPE_SECRET_KEY"],
    "webhook_secret": os.environ["STRIPE_WEBHOOK_SECRET"]
}
domain_url = os.environ["DOMAIN_URL"]
# Set your secret key. Remember to switch to your live secret key in production.
# See your keys here: <https://dashboard.stripe.com/apikeys>
stripe.api_key = stripe_keys["secret_key"]
Integrating Blueprint into Main App
In your main Flask app file, import and register the Blueprint.
from flask import Flask
from payment import payment

app = Flask(__name__)
app.register_blueprint(payment, url_prefix="/payment")
if __name__ == "__main__":
    app.run(port=3000)
Now any routes that you create within the payment.py will be accessible via /payment/*
Integrating Flask with Stripe
Creating Checkout Session Endpoint
Define a route within your payment.py to create a Stripe checkout session.
A checkout session allows your customer to create subscription for a product.
Example checkout session route:
@payment.route("/create-checkout-session", methods=["POST"])
def create_checkout_session():
    data = request.json
    try:
        checkout_session = stripe.checkout.Session.create(
            payment_method_types=["card"],
            mode="subscription",
            line_items=[{"price": data["price_id"], "quantity": 1}],
            success_url=f"{domain_url}/success?session_id={CHECKOUT_SESSION_ID}",
            cancel_url=f"{domain_url}/cancel",
        )
        return jsonify({"sessionId": checkout_session.id})
    except Exception as e:
        return jsonify(error=str(e)), 403
In side the stripe.checkout.Session.create method, the variable mode is set to subscription because I’m focusing on creating a subscription model for the Flask app but it can be changed to payment or setup
subscription= recurring paymentpayment= one time paymentsetup= save customer payment info and charge later
more details can be found in the Stripe Doc
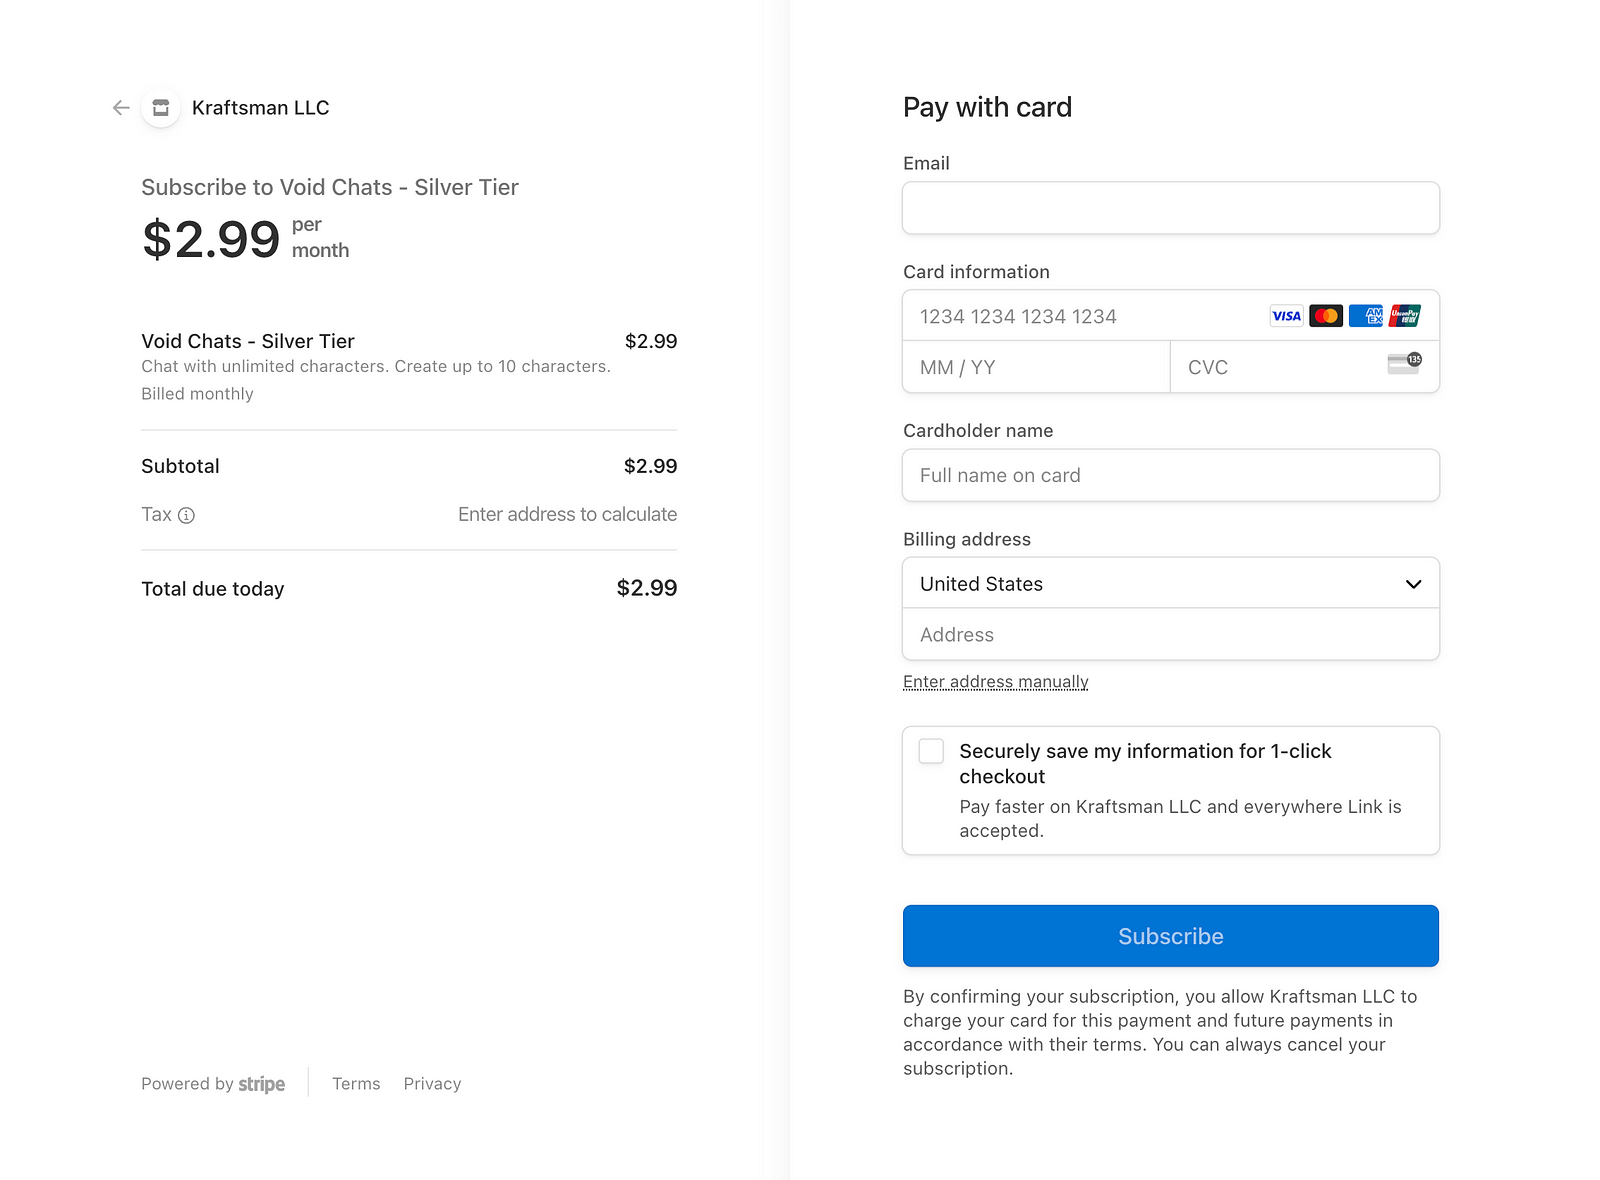
Example Checkout Session
Managing Webhooks with Blueprint
Similarly, handle Stripe webhooks within your payment.py Blueprint.
To explain it simply webhooks in Stripe act like a notification system. When a specific event happens in your Stripe account (like a successful payment), Stripe sends a message (webhook) to your specified URL endpoint. This message tells your application about the event, allowing it to respond accordingly.
Example webhook route:
@payment.route("/webhook", methods=["POST"])
def stripe_webhook():
    payload = request.get_data(as_text=True)
    sig_header = request.headers.get("Stripe-Signature")

    try:
        event = stripe.Webhook.construct_event(
            payload, sig_header, stripe_keys["webhook_secret"]
        )

    except ValueError as e:
        # Invalid payload
        return "Invalid payload", 400
    except stripe.error.SignatureVerificationError as e:
        # Invalid signature
        return "Invalid signature", 400

  # There are alot of event types you can listen for and I have listed all of them below
    if event['type'] == 'checkout.session.async_payment_failed':
        session = event['data']['object']
    elif event['type'] == 'checkout.session.async_payment_succeeded':
        logger.info("Payment succeeded")
        session = event['data']['object']
    elif event['type'] == 'checkout.session.completed':
        session = event['data']['object']
        handle_checkout_session(session)
    elif event['type'] == 'checkout.session.expired':
        session = event['data']['object']
    elif event['type'] == 'customer.created':
        customer = event['data']['object']
    elif event['type'] == 'customer.deleted':
        customer = event['data']['object']
    elif event['type'] == 'customer.updated':
        customer = event['data']['object']
    elif event['type'] == 'customer.discount.created':
        discount = event['data']['object']
    elif event['type'] == 'customer.discount.deleted':
        discount = event['data']['object']
    elif event['type'] == 'customer.discount.updated':
        discount = event['data']['object']
    elif event['type'] == 'customer.source.created':
        source = event['data']['object']
    elif event['type'] == 'customer.source.deleted':
        source = event['data']['object']
    elif event['type'] == 'customer.source.expiring':
        source = event['data']['object']
    elif event['type'] == 'customer.source.updated':
        source = event['data']['object']
    elif event['type'] == 'customer.subscription.created':
        subscription_object = event['data']['object']
    elif event['type'] == 'customer.subscription.deleted':
        subscription_oject = event["data"]["object"]
        handle_canceled_subscription(subscription_oject)
    elif event['type'] == 'customer.subscription.paused':
        subscription_object = event['data']['object']
    elif event['type'] == 'customer.subscription.pending_update_applied':
        subscription_object = event['data']['object']
    elif event['type'] == 'customer.subscription.pending_update_expired':
        subscription_object = event['data']['object']
    elif event['type'] == 'customer.subscription.resumed':
        subscription_object = event['data']['object']
    elif event['type'] == 'customer.subscription.trial_will_end':
        subscription_object = event['data']['object']
    elif event['type'] == 'customer.subscription.updated':
        subscription_oject = event["data"]["object"]
        handle_update_subscription(subscription_oject)
    elif event['type'] == 'customer.tax_id.created':
      tax_id = event['data']['object']
    elif event['type'] == 'customer.tax_id.deleted':
      tax_id = event['data']['object']
    elif event['type'] == 'customer.tax_id.updated':
      tax_id = event['data']['object']

    return "Success", 200

def handle_canceled_subscription(subscription_oject):
  ...

def handle_update_subscription(subscription_oject):
  ...

def handle_checkout_session(session):
  ...
You can register your app’s webhook at https://dashboard.stripe.com/webhooks.
Stripe has very good documentation on how to set it up so I wont get into details here.
Manage Stripe Subscription using Stripe Billing Portal
Often time user might want to manage their subscription, change payment method, cancel subscription and etc. Thats where the Stripe Billing Portal come in. Stripe’s Billing Portal UI simplifies subscription management, offering an intuitive, secure interface with minimal development effort.
Configuring Stripe Billing Portal
Within payment.py, set up your Stripe billing portal configuration, specifying your business profile and features.
stripe.billing_portal.Configuration.create(
    business_profile={"headline": "Your Business Name"},
    features={
        "invoice_history": {"enabled": True},
        "customer_update": {"enabled": True, "allowed_updates": ["address", "name"]},
        # Add other features as needed
    },
    default_return_url="<http://yourdomain.com/home>",
)
For more configuration options refer to the Stripe Doc
Register a route to return customer portal link
@payment.route("/api/stripe/customer-portal", methods=["GET"])
def customer_portal():
    # Authenticate your user.
    ...

    # Get the customer's ID in Stripe's system.
    stripe_customer_id = ...

    # Create a session for the Customer Portal.
    session = stripe.billing_portal.Session.create(
        customer=stripe_customer_id,
        return_url=domain_url + "/home",
    )
    # Redirect the user to the Customer Portal.
    return jsonify({"url": session.url})
Finally in your frontend application redirect to the customer portal to allow user to manage their subscription
Below is an example for Angular app
openCustomerPortal(){
    // open stripe's cutsomer portal link
    this.http.get("YOUR_API_URL/api/stripe/customer-portal").subscribe(
      (res:any)=>{
        window.location.href = res.url;
      }
    )
  }
Conclusion
Now you can keep your Stripe payment integration clean, organized, and maintainable using Flask Blueprints. This approach not only enhances the readability of your code but also makes it easier to manage and update different parts of your application independently.
You have now followed along the tutorial and is able to create a subscription payment system using Stripe and Flask. Hopefully this is valuable to you and happy creating!
Thank You for reading until the end 😎.
Follow me on Twitter(x) @TheWayOfWang